Saturday, March 1, 2014

Florida Strawberry Festival 2014


Saturday, March 1, 2014

This morning Sherry and I drove to Plant City to the Florida Strawberry Festival.  Met up with the end of a parade.


We followed the parade to the festival grounds.  These little girls were the last group in the parade.


Our number one priority was the Quilting exhibit, where Sherry had two quilts on display.


Both of Sherry's entries got blue ribbons!


Second priority was strawberries with cake and whipped cream.


Then on to the other exhibits.


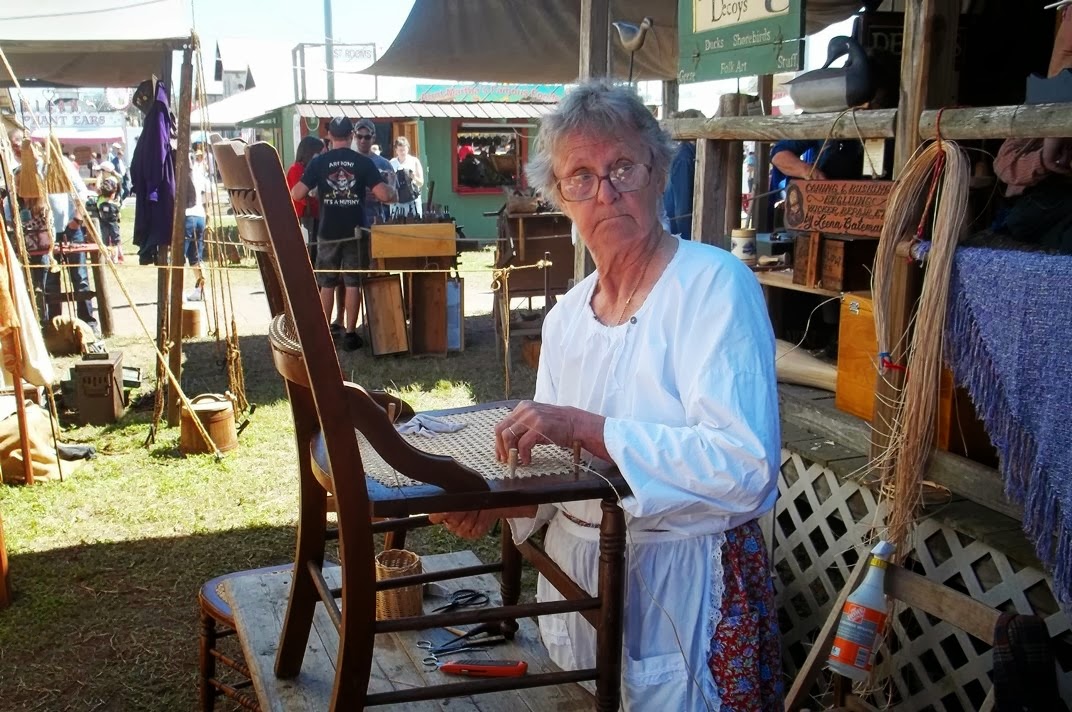
Black smithing and chair caning.


I always like to see the farm animals.  But they have taken most of the fun out of the animal exhibits by putting the animals behind fences and not allowing us to pet them.  Even the strawberry festival has lawyers now.


These cows were tied up by mistake where visitors could get to them.  We heard an announcement later telling the exhibitors to move their cows.


I think this little girl was lucky not to get stepped on.


 Judging dairy cows in the arena.


There were plants as well as animals.


Nonmetal chickens.  Wish I could have recorded the crowing.  It was almost deafening.


Here's what I needed when I was working on the hole.


There were a lot of cool rides ...


 but I couldn't get Sherry to go on them.

Sunday, February 16, 2014

Waning Gibbous Moon


Setting in the west, Tampa, FL, 6:28 AM 2/16/2014

Saturday, February 8, 2014

The Chicken Comes Home

Saturday, Feb. 8, 2014

As planned, Sherry and I rented a truck today and drove to Circus City Architectural Salvage in Sarasota to pick up her giant metal chicken.


This is the place to go if you are looking for funky decorations for your house.


An employee helped me load the chicken into our truck.


Back at home, Sherry and I unloaded the chicken and positioned it in front of the house.


The neighbor's dog was not amused.

Sherry and the chicken.  Compare heights.


We had to get a big truck in order to have enough headroom for the chicken to stand up.


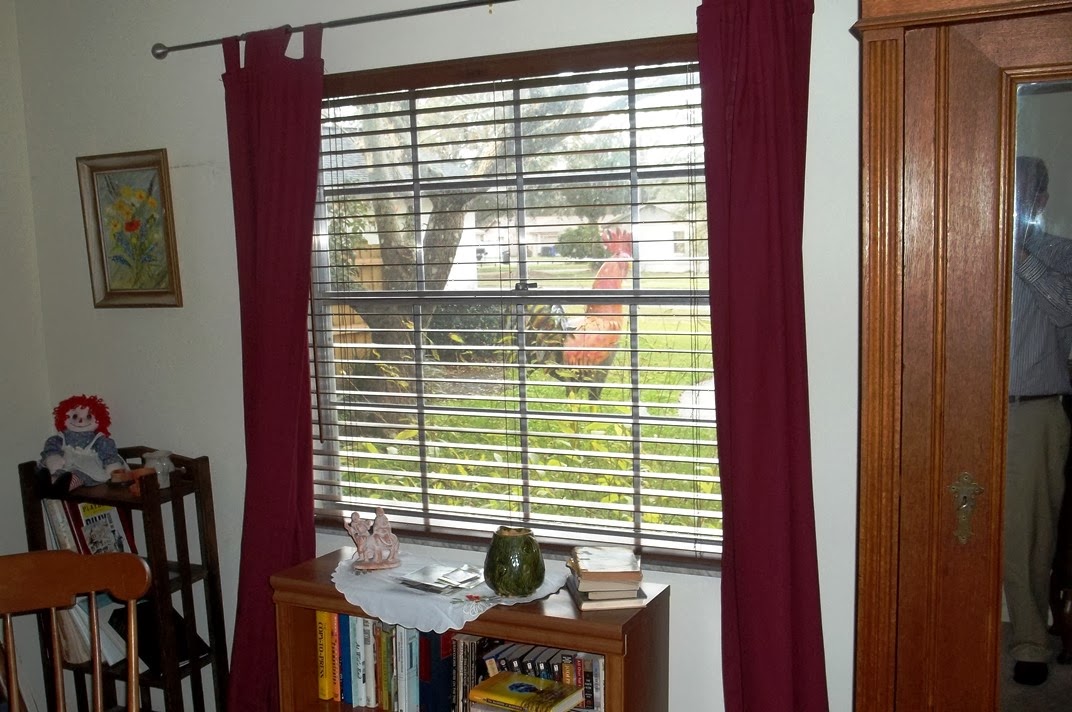
The new view from our bedroom.


Unplanned selfie on right edge of the picture.  Fortunately I was fully dressed.


Sunday, February 2, 2014

Finishing Up


Sunday, Feb. 2, 2013
There were just a few small tasks left for me to do this weekend.  I trimmed one of the 4x6 beams that fill the channel back by about six inches.  This will permit a gap between the beams, which will provide some finger room, making it much easier to remove the beams when I need to open the channel.  The gap won't be visible because there will be 1x6 boards on top of the beams and these will fill the length of the channel.  Hopefully they will not be very difficult to remove.

I needed a mini retaining wall on the east end, similar to the one I installed on the south side last weekend.  Fortunately I still had enough concrete board for this, avoiding a trip to Lowe's.


I stained the top boards in the channel, using the same stain that I had used on the deck sections.  Again I had enough material left from previous work.  This must be my lucky day!

The final task was to refill the trenches that I had dug to provide access to the retaining walls.


I hereby declare the catch basin finished!

The next phase of work is to install pavers, replacing those that I dug up in order to install the catch basin and extending the patio into the foreground in the picture above.  But I intend to hire a contractor for that.


South Side Retaining Wall


Saturday, Jan. 25, 2014
Last weekend I poured the concrete for a footing that would form the base of a channel along the south side of the basin.


Today I removed the form.  This turned out to be quite easy.


The main motivation for the footing was to provide a stable foundation for a mini retaining wall, which is needed to prevent dirt from sloughing off into the channel when it is opened to permit the deck sections to be opened.

I decided to use concrete board for the retaining wall, and attach it to the footing with Tapcons.  I had two sheets of concrete board available, which I had bought for the other side of the basin but decided not to use there.  I had already sliced the 3' by 5' sheets into halves, each 18 inches wide and five feet long.  In order to attach them to the footing, I had to dig out a trench beside the footing, wide enough that I could use a drill to make holes for the Tapcons.


Sunday, Jan, 26, 2013
I cut one of the 18 inch wide slices of concrete board down to four feet, giving a total of 14 feet from that piece plus two whole slices.  Getting the concrete board slices aligned with the top of the deck was not difficult.  I used a combination of dirt and wood shims to hold up the slices at exactly the right height.


But there was an embarrassing mistake.  Despite my following the old craftsman's adage, "Measure twice, cut once", the wall turned out to be about six inches short.


I still don't know how this could have happened.  I was being very careful with the measurements.  But it did.  I had to cut and add a six inch wide slice at the end.  Extra work that shouldn't have been necessary.  Plus it made the wall just a little bit less solid.

Saturday, January 25, 2014

Pouring Concrete


Saturday, Jan. 18, 2014

Today I faced up to the challenge of mixing and pouring concrete.  This is the first time I have tried doing anything with concrete beyond setting fence posts.  But the project was small enough that I didn't feel apprehensive about it.

Today's objective was to build a concrete footing, 5 and 1/2 inches wide and four inches deep, on the south side of the basin, even with the top of the basin wall.  I had bought the concrete mix, Quikcrete, the previous weekend, had built a form for the footing, and laid four inches of sand as a base.  All that remained was to mix the concrete and place it into the form.

I used a wheel barrow to mix the concrete, one 50 pound bag of Quikcrete at a time.


I didn't dare just pour the concrete into the form from the wheel barrow.  I used a shovel, and placed one shovel full at a time into the form, trying to fill the form evenly up to the top.

Following the advice of my concrete book, I used the shovel to work the concrete mix into the space under the rebar, attempting to fill the form evenly, and used a small piece of wood to "screed" the excess from the top.  Also tapped the side of the form with a hammer, which the book says "draws finer aggregates in the concrete against the forms, creating a smoother surface on the sides."


Here I have finished placing the concrete mix, and "bleed water" is starting to appear.  Again quoting the book, "Timing is the key to an attractive concrete finish.  When concrete is poured, the heavy materials gradually sink, leaving a thin layer of water--known as bleed water-- on the surface. To achieve an attractive finish, it's important to let bleed water evaporate before proceeding with the other steps."


The next step would be to smooth the surface with a "float", a tool that is essentially just a flat piece of wood with a handle.  It was already getting dark, and I needed to wait for the bleed water to evaporate, which takes an hour or two, but I couldn't wait until the next day.  By the next morning the concrete would be set and impossible to smooth.

I set up work lights, and did the float work well after dark.


Sunday, Jan. 19, 2014

The smoothing did not turn out very good.


I would not want a sidewalk that looked like this.  But, fortunately, this concrete will not normally be visible.  Apparently there is some real skill involved in producing a nice concrete surface.


Monday, January 20, 2014

Another Concrete Form


Saturday, Jan. 11, 2014

When the catch basin project is finished, there will be a patio with brick pavers on the both sides of the deck.  The pavers will be even with the top of the deck, so that the overall surface is level and smooth.  But the pavers cannot abut the deck on the left side in the photo below, or I would not be able to raise the deck sections.  I need a channel, with width and depth equal to the thickness of the deck, for the deck sections to go into when they are raised.


The channel will have to be open in order for a deck section to be raised, but should be closed normally, so that there is a smooth surface from the deck across the channel to the pavers.  I spent a fair amount of time thinking about how to handle this.

The solution that I decided on was to fill the channel with wood.  A thick wooden beam beside the deck could provide a solid stable surface, level with the deck, but could be removed to provide the open channel necessary for raising the deck sections.  In the photo below, I am trying out this idea with two 4x6 beams, each seven feet long.  I think the beams are heavy enough to provide a stable surface without being attached to the basin, but light enough to be lifted out when I need to raise the deck sections.


A problem was that the hinges protrude about a quarter of an inch from the basin wall, preventing the beam from closely fitting against the deck section.  I solved this problem by cutting a small strip out of the beam.

I originally though that cutting a strip out of the beam would be a difficult (or impossible!) task with the tools that I have.  But then I discovered that the cutting depth of my Skill saw is adjustable.  (Maybe I should have read the user manual when I bought it!)  By adjusting the blade to cut the required depth for each side of the strip, I was able to make a single cut along the full length of the beam in each dimension and remove the strip.  It turned out to be surprisingly easy.


To exactly accommodate the deck sections, the channel needs to be five inches in both width and depth. The width of the 4x6 beam (five and one half inches) matches the needed width with with half an inch to spare.  But, unfortunately, the thickness (three and one half inches) is too small.  With the beam sitting at the same level as the base of the deck sections, it only comes up to the bottom of the deck planks, not to the top.  


I plan to solve this problem by placing a plank of the same thickness as the deck planks on top of the beam.  I will attach this plank firmly to the beam, producing the effect of a beam that is five and one half inches square.

The next problem was that I need something to prevent dirt from falling into the channel when the beams are not in place.  (The same problem that I had to deal with on the other side of the basin.)  I need a fixed barrier, with its top even with the surface of the deck, to act as a tiny retaining wall.  This barrier will form the left wall of the channel.

My first idea was to use strips of concrete board, which is sold as the backing material for the tile in shower stalls.  The concrete board comes in sheets three feet wide by five feet long.  I bought two sheets and cut them in half along the length, producing strips 18 inches wide and five feet long.


The plan was to simply embed these strips in the dirt beside the channel, making the top of each strip even with the top of the deck.  This required digging a trench beside the channel.  I would place the strips of concrete board in the trench, snug up against the beams, and back fill with dirt to hold them in place.


Unfortunately, I could not get the concrete board strips to align with the top of the deck.  It seemed that I needed something more solid than dirt to hold them.  I also worried that even if I could get them aligned initially, they would not stay aligned.  So I lost confidence in this plan.

Plan B was to put a concrete footing under the channel and attach the retaining wall to the footing.  I had considered this plan previously, but rejected it as too much work.  Now it seemed like the right solution.

Building the concrete footing seemed like a small enough project that I could do it myself (unlike the basin.)  Build a form.  Mix Quickcrete by hand in a wheelbarrow, and shovel it into the form.  A good learning project.

Sunday, Jan. 12, 2014

According to my concrete book, a slab should be at least four inches thick in order to avoid cracking.  The footing should be at least five and one half inches wide to match the width of the beam.  And it would be 14 feet long.

The concrete book recommends putting three inches of sand as a base under a footing. 

I computed the amount of sand I would need for the base and the amount of Quickcrete I would need for the footing and set off to Lowe's.  I came home with five 50 pounds bags of sand, seven 50 pound bags of Quickcrete, and two 10 foot lengths of 3/8 inch rebar.  Also, eight widgets to support the rebar two inches above the sand base.

I removed the beams that were beside the basin, and dug a trench down to seven inches below the top of the basin.  I tried to make the depth as accurate as possible, as it would determine the amount of sand that would be beneath the concrete.

Next I needed to build a form for the concrete.  I had some scrap wood from shelves in the garage that I replaced some time ago, which was suitable for making the form.  (Packratism pays off again!)  I cut the boards to a width of seven inches and installed them in the trench that I had dug beside the basin.  I used small strips of wood to hold the form five and one half inches from the basin and back filled with dirt to hold the form in place.  I used short pieces of 4x6 to make the ends of the form.


I filled in three inches of sand as a base for the slab, leaving four inches to top of the form.  Filling the form with concrete would produce the four inch thick slab.  The top of the slab would be even with the top of the basin and bottom of the deck.


By the time I finished with the sand, it was getting dark, and I was getting tired.  Mixing and placing the concrete would have to wait until the next weekend.